✢ A list of [Batch operations]
Written By Penny
Last updated About 1 month ago
This section lists the profile batch operations for easier configuration of multiple profile environments.
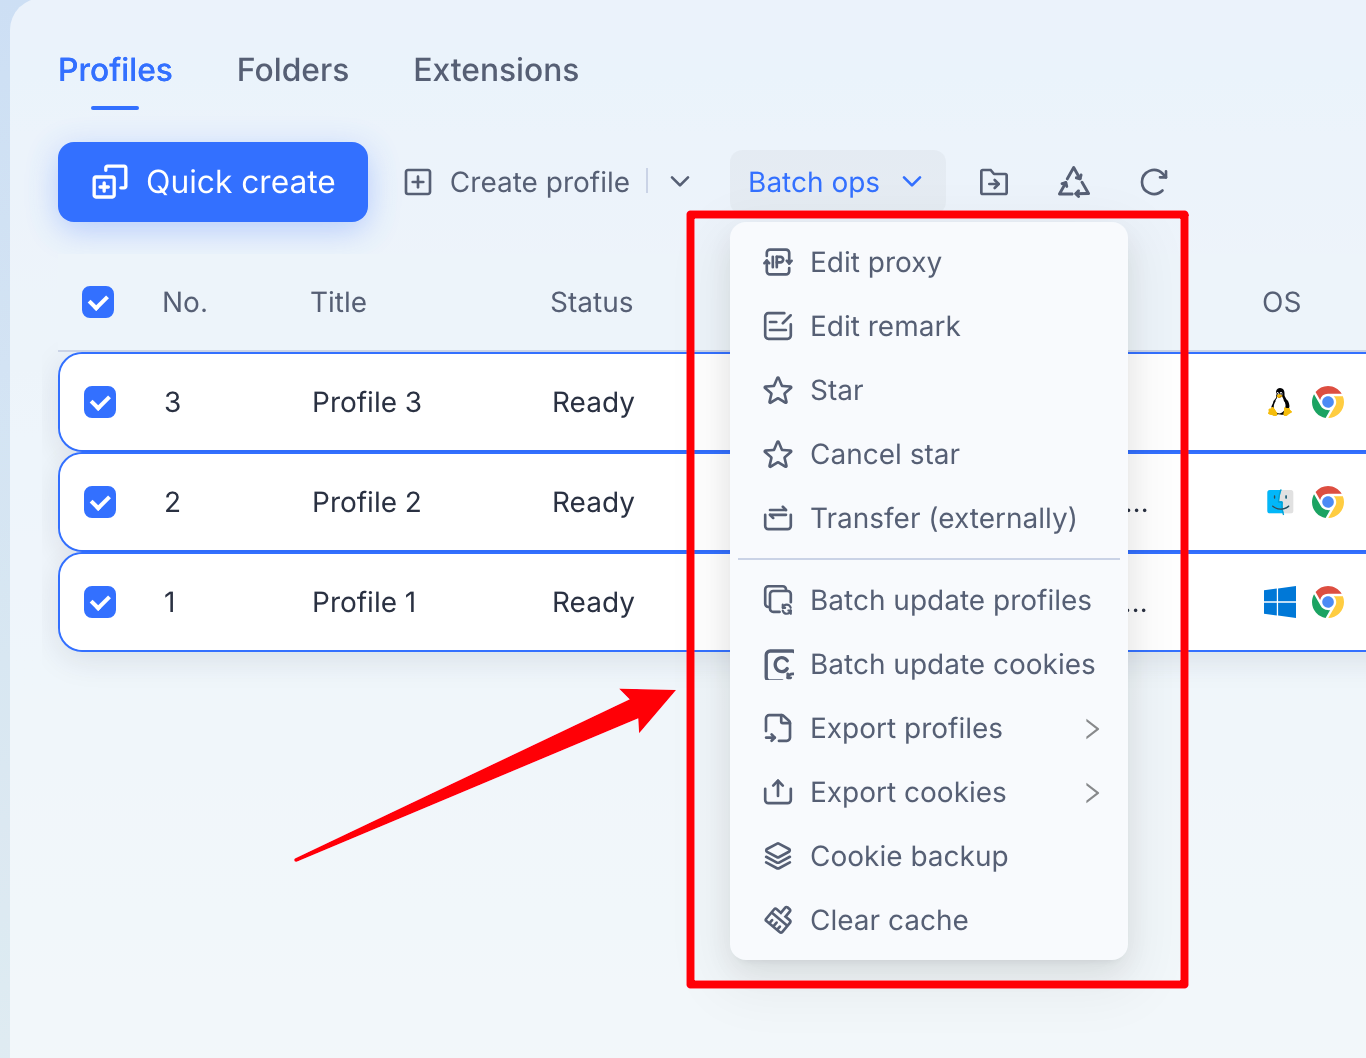
1. Edit proxy
Apply or change proxy settings for multiple selected profiles at once. This is useful if you need to switch proxies for a group of accounts. For detailed proxy edit, please refer to How to [Create] a brand new profile - 2. Proxy.
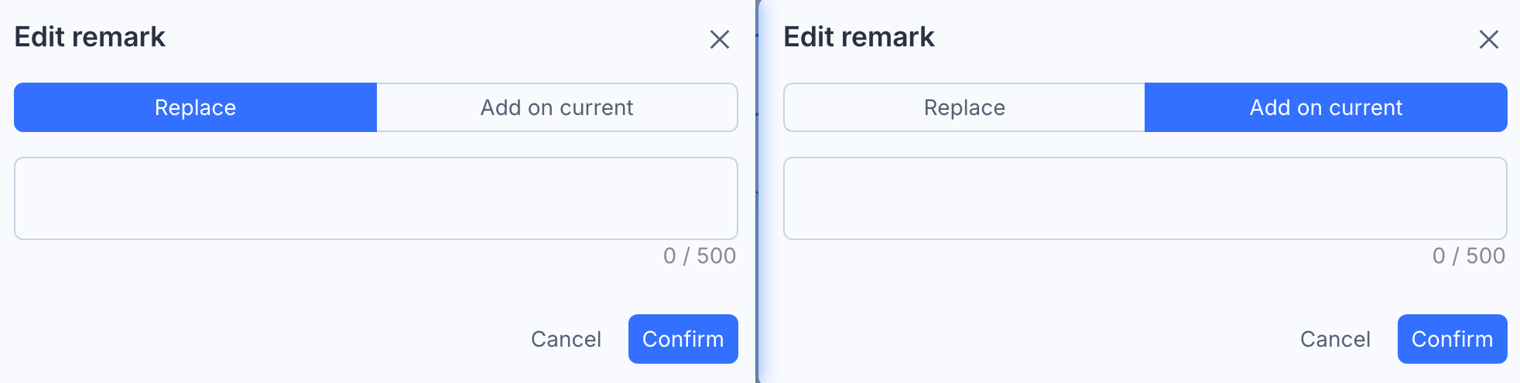
2. Edit remark
You can replace or add on selected profiles' current remarks.
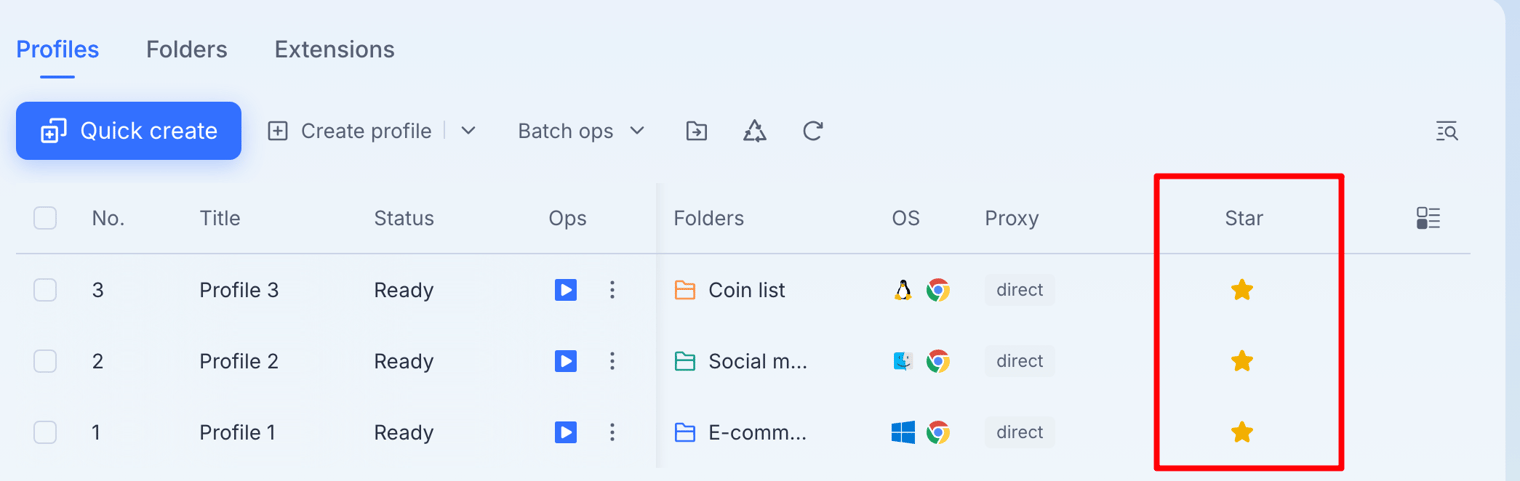
3. Star / Cancel star
Mark profiles as "starred" for easy identification or prioritization.
4. Transfer (externally)
This feature allow profiles to be transferred outside of your team.
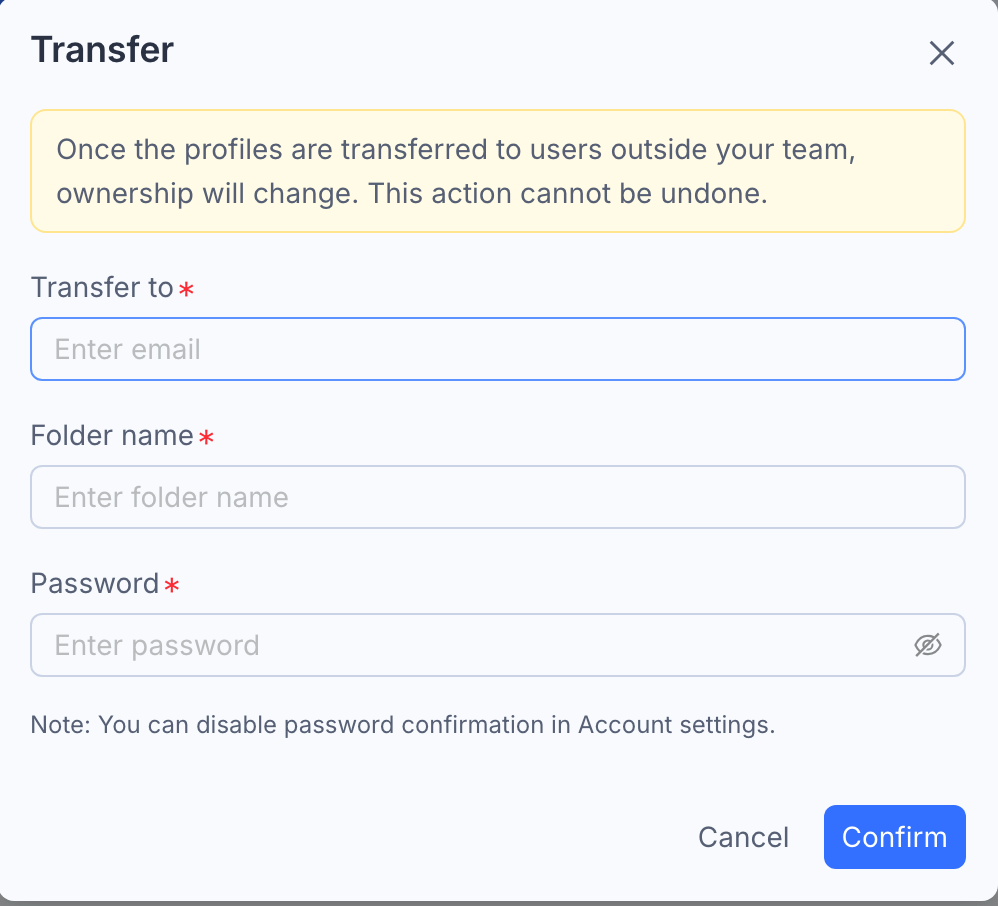
Enter the email of the user you are transferring the profiles to.
Enter the exact folder name for the profiles to be transferred to (if you're not sure, confirm with them first).
Password: Enter your login password to continue. If you don't want the extra data protection layer, you can disable the password verification in Account settings-Password and security.
⚠️ Warning: This action cannot be undone.
5. Batch update profiles
Refer to How to [Batch update] profiles for detailed description.
6. Batch update cookies
Update cookies for multiple profiles by importing. This is particularly useful for pre-loading login sessions.
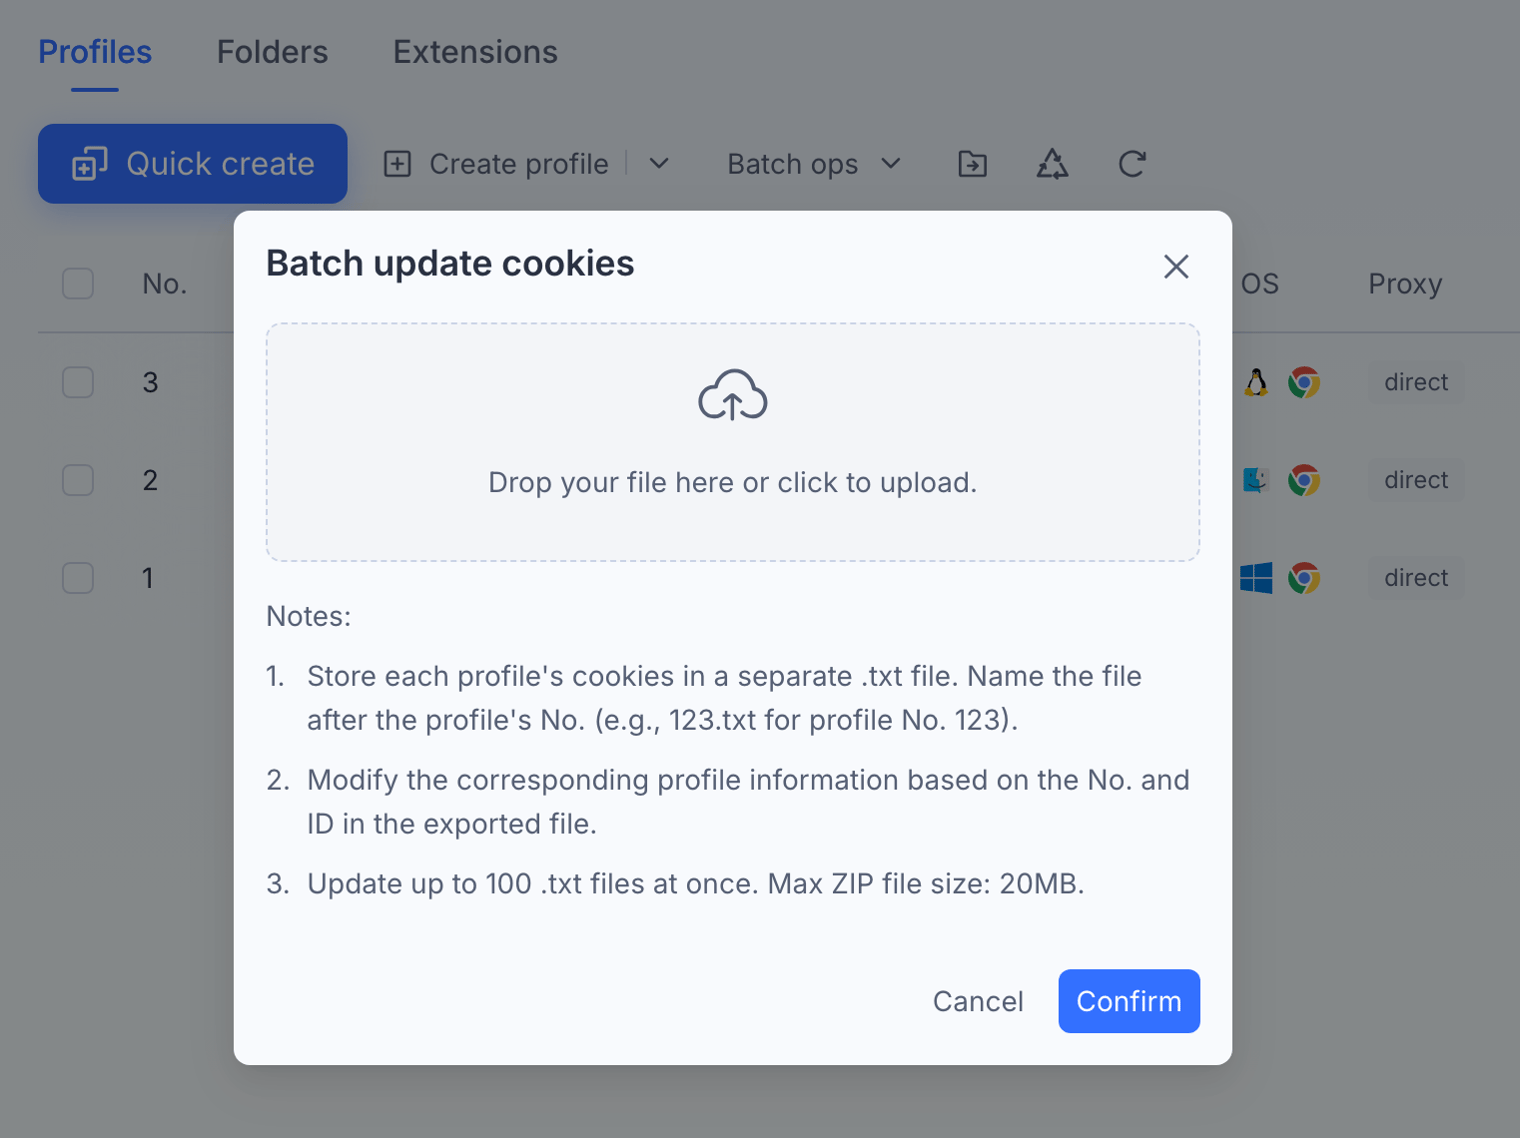
6.1 Preparing your cookie files
Before uploading, you need to prepare your cookie files according to the specified format:
Each profile's cookies must be stored in a separate
.txtfile.Name each
.txtfile after the profile's "No." (ID).If you have a profile with "No." 123, its cookie file should be named
123.txt.This "No." is typically displayed in the main "Profiles" list (refer to the previous user manual).
6.2 Modifying profile information (if applicable)
Match profile IDs: Ensure that the "No." (ID) in your exported cookie file matches the "No." of the target profile in your anti-detect browser.
Update profile details: If the exported data contains other profile-specific information (beyond just cookies), you might need to adjust or align that information with your existing profiles. This step is more about ensuring data consistency if you're migrating data, rather than a direct action within this cookie upload dialog.
6.3 Uploading your cookie files
Drag and drop:
Locate your
.txtcookie files (or a single.zipfile containing them) in your file explorer.Drag the files directly into the designated upload area ("Drop your file here or click to upload.") within the dialog box.
Click to upload:
Click anywhere within the designated upload area ("Drop your file here or click to upload.").
This will open your system's file browser. Navigate to the location of your
.txtcookie files or the.zipfile, select them, and click "Open" or "Upload."
6.4 Upload limits
Number of files: You can update up to 100
.txtfiles at once.ZIP file size: If you upload a compressed
.zipfile containing multiple.txtfiles, the maximum size of the.zipfile is 20MB.
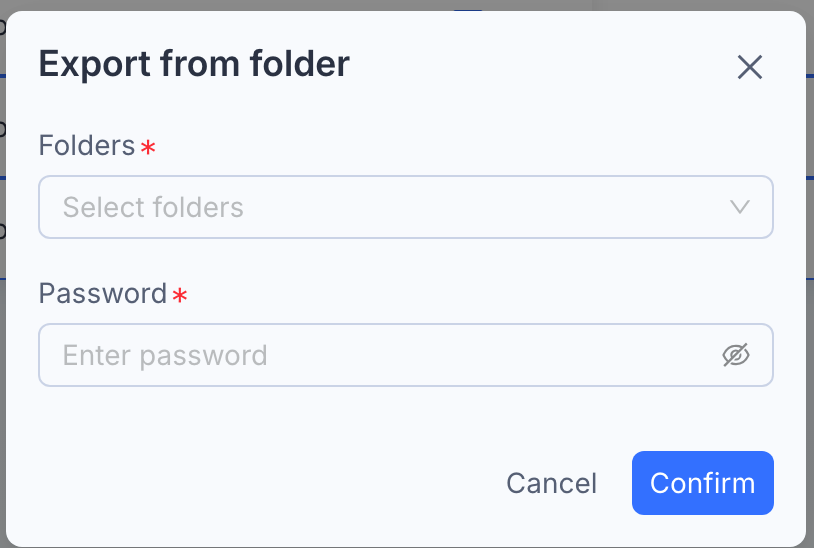
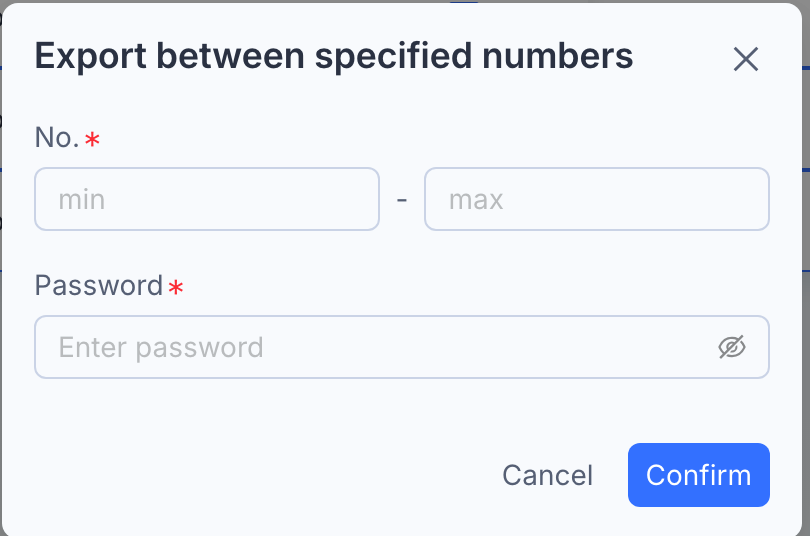
7. Export profiles
When you click "Export profiles" from the "Batch ops" dropdown, you will see the following sub-options:
Selected: Choose this option to export only the profiles that you have currently selected (checked) in the main profiles list. This is useful for exporting a specific subset of profiles you've manually picked.
From folder: Select this option to export all profiles contained within a specific folder. This is an efficient way to export profiles that you have organized into categories using the "Folders" feature.
Designated numbers: Use this option to export profiles by entering their specific profile numbers (IDs). This allows for precise selection of profiles for export, even if they are not selected in the list or organized in a single folder.
8. Export cookies
Exporting cookies is the same as exporting profiles.
9. Cookie backup
Create a backup of the cookies for selected profiles.
10. Clear cache
Clear the browser cache for selected profiles. This can help resolve display issues or free up space.